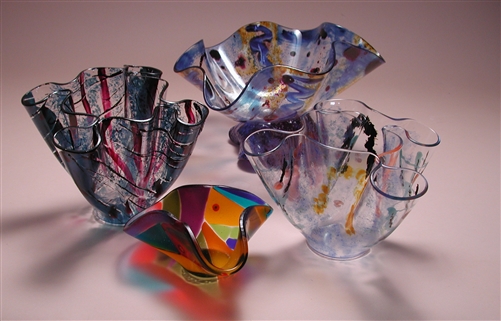
Glass slumping is an intricate and captivating art form, enabling artists to transform flat glass sheets into stunning three-dimensional pieces. This process involves heating glass until it becomes soft and pliable, allowing it to mold into the desired shape using a kiln. Mastering the art of glass slumping requires patience, precision, and a keen understanding of the materials and techniques involved. This guide will walk you through the essential steps to create your own beautiful slumped glass art, from selecting the right materials to refining your technique. For those eager to delve deeper into the nuances of glass slumping, explore advanced guides and tips available to elevate your craft.
Understanding the Basics of Glass Slumping
Before diving into the creative aspects, it is crucial to grasp the basic principles of glass slumping. This technique involves several key elements:
- Glass Compatibility: Ensure that the glass pieces used are compatible in terms of their coefficient of expansion (COE). Mismatched COE can lead to cracks or breakage during the slumping process.
- Slumping Molds: Choose molds that are appropriate for the desired shape and size of your project. Molds can be made of ceramic, stainless steel, or other heat-resistant materials.
- Firing Schedule: A well-planned kiln firing schedule is essential to achieve the desired slump without over-firing the glass. This includes ramping up to the target temperature, holding, and then cooling down gradually.
For a comprehensive understanding of these components, find out more about this approach to ensure successful outcomes in your projects.
Step-by-Step Guide to Glass Slumping
Step 1: Preparing Your Materials
Begin by selecting compatible glass sheets and preparing them by cleaning thoroughly to remove any dust, oils, or residues that might affect the final result. Cut the glass to the desired size, considering the mold dimensions and the slump effect you wish to achieve.
Step 2: Setting Up the Mold
Apply a suitable separator or kiln wash to the mold to prevent the glass from sticking. Position the mold inside the kiln, ensuring it is stable and centered. This is crucial for achieving an even slump.
Step 3: Firing the Kiln
Program the kiln to follow a precise firing schedule. A typical schedule includes:
- Ramp Up: Gradually increase the temperature to the target slumping point, usually between 1200?F to 1300?F.
- Hold: Maintain the target temperature to allow the glass to form smoothly around the mold.
- Cool Down: Slowly lower the temperature to avoid thermal shock that can crack the glass.
Each project may require adjustments to this schedule. For tailored solutions, learn about our tailored solutions that can guide you in customizing your firing process.
Step 4: Finishing Touches
Once the kiln has cooled and the glass has reached room temperature, carefully remove the piece from the mold. Inspect for any imperfections or desired adjustments. Sand or polish edges to enhance the final appearance and ensure safety.
Advanced Techniques and Troubleshooting
As you grow more confident with basic slumping, you may wish to explore more advanced techniques such as incorporating multiple layers of glass, adding decorative elements, or experimenting with different mold shapes. Challenges such as uneven slumping or unwanted textures may arise, but these can be addressed by refining your approach or adjusting the firing schedule.
To expand your skill set and address common issues, discover expert strategies here to enhance your craftsmanship and achieve consistently excellent results.
Mastering the art of glass slumping is a rewarding journey that combines creativity with technical skill. By understanding the foundational elements and gradually incorporating advanced techniques, artists can create breathtaking works of art that captivate and inspire. Whether a novice or experienced glass artist, the resources and guides available provide valuable insights to perfect this exquisite art form.